Thursday, November 23, 2023

Fun and easy boxes to make for small Christmas gifts.


Hi everyone, 

I hope you all had a great Thanksgiving if you live in the U.S. Mine was pretty quiet, I spent most of the day in my stamp studio designing tonights projects. My wonderful hubby made dinner for us. We had turkey pot pie, and my mom's apple salad. Pumpkin pie and custard for dessert, also made by hubby. 

Now that Thanksgiving is over the Christmas season will be in full swing. My daughter and I will go Black Friday Shopping tomorrow, it will be an early morning since we want to be at Khols when they open at 5am. The others open at 6am, so we will hit them along the way. We look for certain things each year and usually find most of them.

 You can follow along with me as I show you how to put these boxes together. 

Suzie Q's Stamping Youtube

Measurements for all boxes


All Images © Stampin' Up! ® 1999-present
Box 1 Measurements:ardstock 8-1/2" x 8-1/2" scored on all four
sides at 2-3/4"
Cut 1-1/4" off each corner.
Use adhesive of your choice to assemble the box. 
Decorate how you want. I used retired DSP for
the lid and each side. I stamped the bear from the Beary Cute Bundle on Basic Black with 
Versa Mark and embossed on with clear embossing power. I masked off the sentiment Merry Christmas, stamped in Versa Mark on Real Red and embossed with black. I punch out the greeting using the Modern Oval Punch then attached the bear.


The next box I made is large enough to hold a three wick candle from Bath & Body Works. It can also serve as a gift box to put lots of little things in.   
Candle Box Measurements:
Cardstock 2 pieces cut 8-3/4" x 8-1/2"
Score your cardstock with 8-3/4" side at the top of your trimmer or score tool. Your score lines will be at 4-1/8", and 8-1/4". Rotate your cardstock clockwise so the 8-1/2" side is at the top of the trimmer or score tool. Score at 4-1/8" and 7-3/4".
Cardstock 8-3/16" x 8-3/18" for the lid scored at 1" & 2" on all four sides.
I used retired DSP to embelish this box. 


                         All Images © Stampin' Up! ® 1999-present


 The final box is so simple to make and you can decorate any way you want. It will hold Hershey Minitures but I found some Ghirardelli mini chocolates that fit.

Mini Treat Box Measurements:
Cardstock 5-1/4" x 5-1/2"
With the  5-1/4" at the top of the trimmer or score tool, score at 1/2", 1", 4-1/4", 4-3/4".
With the 5-1/2" side at the top of the trimmer or score tool, score at 1/2", 2-1/2", 3", 5".
Refer to the video and the diagram to cut each side to form the box. 
I used retired DSP for this box. 

           All Images © Stampin' Up! ® 1999-present


Keep in mind that you can use any cardstock and DSP to make these boxes. They would be cute for any occasion. I like to give the wait staff a little gift during December when we go out to eat. They love receiveing a special treat.

Watch for more boxes and bags to come.

Suzie Q
aka Sue Sanders


Monday, November 13, 2023

All About Autumn Designer Series Paper by Stampin' Up!®

Welcome to the November Demonstrator Blog Hop. I love joining other Stampin' Up! ® Demonstrators from around the world showing off our monthly customer thank you cards. Each demonstrator has their own unique style, and I get ideas each month to help my own customers release their inner creativity.

This months thank you cards are made using the All About Autumn Designer Series Paper from the Septemer to December  2023 Mini Catalog. This paper was so popular it sold out and was restocked many times. However, it is no longer being offered. 😭I totally understand your disappointment, I loved it so much and wanted more. 

I have also learned not to hoard beautiful paper. That is why I decided to use up my remaining stash to make my November cards. The layout can be used to make any kind of cards using different Designer Series Paper. 

Image © 1999-present Stampin' Up! ®

I began with a Copper Clay card base 5-1/2" x 8-1/2" scored at 4-1/4". I used the largest square from the Stylish Shape Dies to cut the square from the Very Vanilla layer (5-1/4 x 4) to use for the focal image.
From the Designer Paper I cut a mat 3-3/4" x 5" to adhere to the Very Vanilla mat. I cut a piece of the Natural Ribbon and Copper ribbon to lay in the center of the card. I used the square die and stamped my sentiment and the pumpkins from the Rustic Create stamp set. Use a Blending Brush to ink over the center of the stamped image. The inside is also Very Vanilla 5-1/4" x 4" with the image stamped and shaded in Copper Clay ink.

These cards went together so fast when using the assembly line method, this is when you prepare all the pieces and then assemble the cards. 

Image © 1999-present Stampin' Up! ®
I hope you enjoyed these cards and will try making this layout using other paper and stamp sets.
If you do not already have a Stampin' Up!® Demonstrator, I would love to be your Demonstrator and personal creative coach. Please subscribe to my blog to be notified of new posts. You can also follow me on my Youtube Channel, SuzieQsStamping. I do a live craft class every Thursday night at 7:00pm Central. I offer a rewards program so you can earn Suzie Q Hearts for every $30 you order before shipping and tax. 

Thanks so much for stopping by today, if you started here please click the clicks below to view the other Demonstrators who are participating in this Hop!

Do what you Love, Love what you Do!
Suzie Q
aka Sue Sanders

Friday, November 10, 2023

Thursday Night Free Class - Christmas is comming!

 Hello and welcome to my blog. I am so excited to share some really simple Christmas projects with you. I love to make little gift holders for people and I am always looking for new ideas. I have been busy since I only have 44 days until Christmas. I don't know where the year went but before we know it, it will 2024.

Image ⓒ 1999-Present Stampin' Up!®

This box is not my idea, I found it on Pintrest. The creater is The Paper Pixie, thank you Julie D. for sharing this awesome idea. It holds a Mug Treats, which includes a mix and frosting to bake in a mug. The package I found has 4 mixes and the cost isn't outrageous. I didn't even know these existed until I looked at my local Wal-Mart. I will tell you that not all Wal-Marts carry these, I've looked at several. I looked them up online at Wal-Mart and you can order them. 


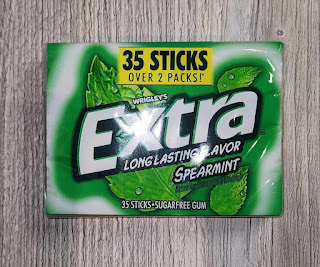
What is nice is this box can hold other treats.  I tried a package of Extra gum and it fits perfectly. The finished size is 4-1/4" H x 4-1/2"D x 3/4" D. Let your imagination go and find something to fill the box.

Here is a free PDF with the measurements. Free Project Sheet
To see how this box is put together watch the video Here
I can see this box made for so many different occasions, Birthdays, Valentines, Just Beacause, and so many more.

If you make one of these I would love to what you filled it with. Post a picture in the comments.

Suzie Q
aka Sue Sanders


Back to Top